Claude Desktop & Web Setup
Connect Tempreon to Claude (web, desktop, or mobile) in under 2 minutes.
Overview
Claude by Anthropic supports the Model Context Protocol (MCP) through its Connectors feature. Connecting Tempreon gives Claude access to your Core Imprint, Knowledge Vault, and full intelligence layer — across claude.ai, the desktop app, and mobile.
Prerequisites
- A Claude account (free or paid at claude.ai)
- A Tempreon account with at least one available Bridge slot
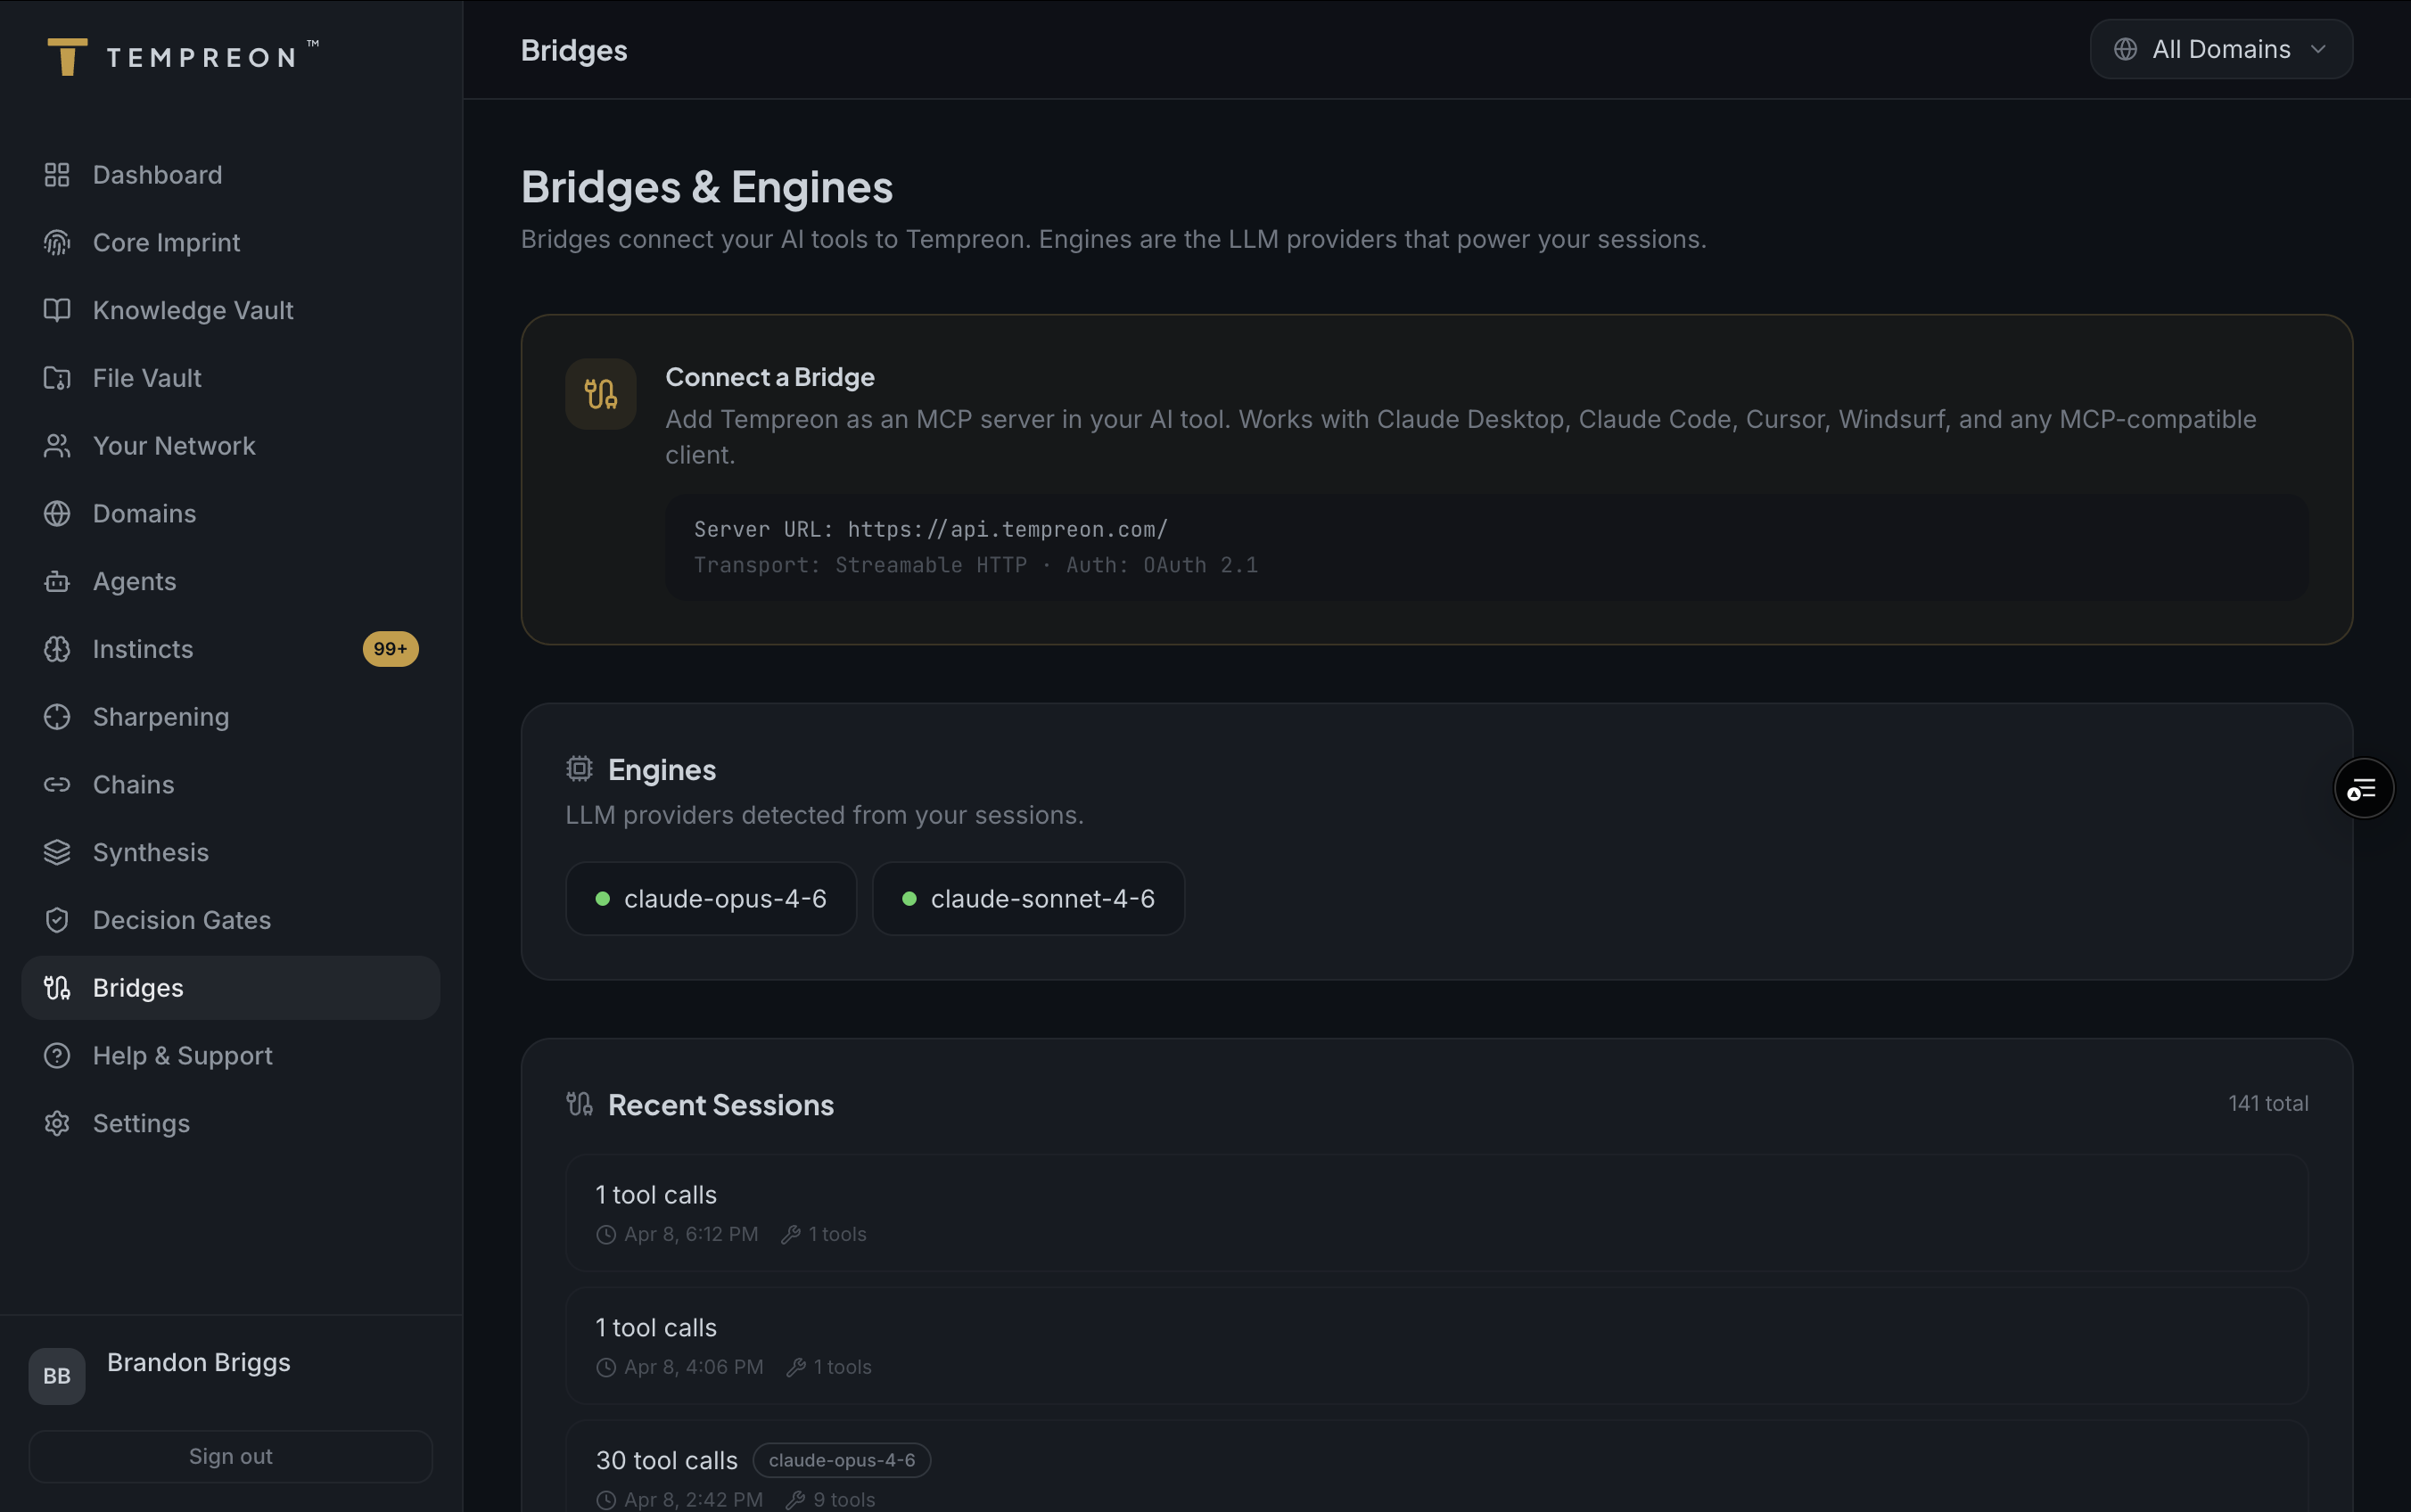
- Your Tempreon MCP server URL (found in your Bridges dashboard)
Step-by-Step Setup
1. Get Your MCP Server URL
Log into Tempreon and navigate to the Bridges section of your dashboard. Copy your MCP server URL — you'll need it in the next step.
2. Open Claude Settings
You have two ways to get to the connector settings:
Option A — Settings:
- Go to claude.ai and log in
- Click your name in the bottom-left corner
- Click Settings
- Navigate to Connectors (or go directly to claude.ai/settings/connectors)
- Scroll to the bottom and click Add custom connector
Option B — Customize:
- Go to claude.ai/customize/connectors
- Click the + icon next to "Connectors" at the top
- Select Add custom connector
3. Add Tempreon
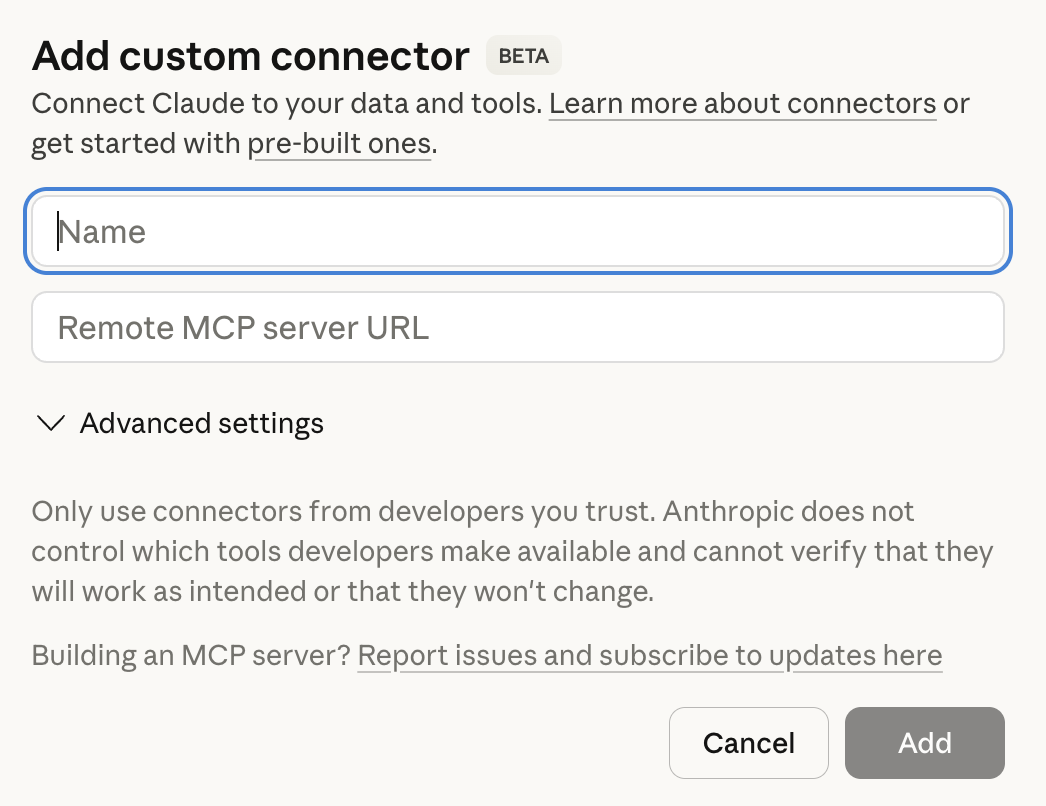
In the "Add custom connector" dialog:
- Name — Enter
Tempreon(or whatever you'd like to call it) - Remote MCP server URL — Paste the URL from your Bridges dashboard
- Click Add

4. Authorize the Connection
After adding the connector:
- Click Connect next to Tempreon in your connectors list
- A browser window opens with the Tempreon authorization page
- Log in to your Tempreon account if prompted
- Review the permissions and click Approve
- You'll be redirected back to Claude — the connection is now active
5. Enable in Your Chats
Once connected, you need to enable Tempreon in your conversations:
- Open a new chat (or Cowork, Code, etc.)
- Click the + button in the chat input area
- Go to Connectors
- Toggle Tempreon on
Tempreon is now active in that conversation. Your AI has access to your Core Imprint, Knowledge Vault, and all connected intelligence.
6. Verify It's Working
Try saying:
- "What do you know about me from Tempreon?"
- "Search my knowledge base"
- "What Tempreon tools do you have access to?"
If Claude responds with your Core Imprint information or lists Tempreon tools, the Bridge is working.
Using Tempreon Across Claude Features
Tempreon works across all Claude modes:
- Chat — Regular conversations with your intelligence loaded
- Cowork — Collaborative work sessions with persistent context
- Code — Development with your architecture decisions and coding patterns
Enable the Tempreon connector in each mode where you want your intelligence available.
After Setup
- Your sessions appear in the Bridges section of your Tempreon dashboard
- The connector stays saved — you don't need to re-add it
- Toggle it on/off per conversation as needed
- Knowledge stored in one conversation is available in the next
Common Issues
| Problem | Solution |
|---|---|
| "Add custom connector" not visible | Scroll to the bottom of the Connectors settings page |
| Authorization page doesn't open | Make sure your browser allows pop-ups from Claude |
| Tempreon not showing in chat | Click + in chat > Connectors > toggle Tempreon on |
| "Connection failed" | Verify the MCP server URL matches your Bridges dashboard exactly |
| Claude doesn't know my context | Start a new conversation with the connector enabled |
For more help, see Troubleshooting Connections.